Quick Answer: How to Fix WireGuard IPv6 Leak on Windows
Edit your WireGuard tunnel configuration and add ::/0 to the AllowedIPs setting. Right-click your WireGuard tunnel in the system tray → Edit selected tunnel → Change AllowedIPs = 0.0.0.0/0 to AllowedIPs = 0.0.0.0/0, ::/0 → Save. This forces all IPv6 traffic through your encrypted tunnel, stopping the leak immediately.
The Windows User’s Trap: Your Fast VPN Is Leaking (WireGuard IPv6 Leak)
You installed WireGuard on Windows for its legendary speed and modern security. The connection feels instant, gaming is smooth, and downloads fly. But there’s a silent privacy failure happening in the background—one that affects nearly every default WireGuard setup on Windows.
If you didn’t manually configure it, your Windows PC is broadcasting your real IPv6 address to every website you visit, completely bypassing your VPN. This isn’t a theoretical risk—it’s a default behavior that undermines your entire privacy setup.
The tech community issued a stark warning about this exact issue:
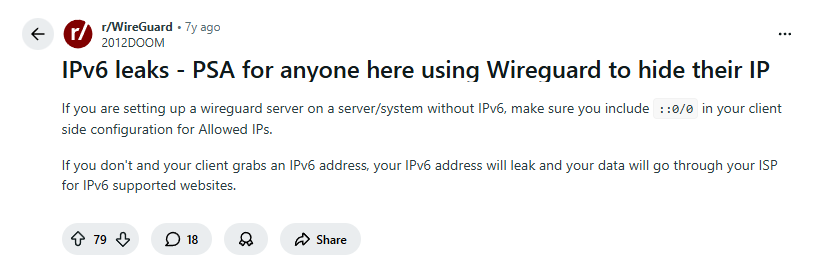
*”If you are setting up a wireguard server on a server/system without IPv6, make sure you include
::/0in your client side configuration for Allowed IPs. If you don’t and your client grabs an IPv6 address, your IPv6 address will leak and your data will go through your ISP for IPv6 supported websites.”*
Windows users are particularly vulnerable because (WireGuard IPv6 Leak):
- Windows 10/11 have IPv6 enabled by default
- Most WireGuard configuration guides only show IPv4 examples
- The leak happens silently—no warnings, no errors
Understanding the Windows WireGuard Problem: AllowedIPs Explained (WireGuard IPv6 Leak)
WireGuard on Windows works differently than traditional VPNs. It doesn’t “take over” your connection—it follows explicit routing rules defined in your tunnel file. The AllowedIPs line is your routing instruction manual for Windows.
When a Reddit user questioned the exact syntax, an expert clarified the crucial detail:
“What’s the difference between using
::/0and::0/0?… Both ultimately expand to0:0:0:0:0:0:0:0… You can shrink any continuous section of zeros with::, but never more than one.”

For your Windows WireGuard config (.conf file):
AllowedIPs = 0.0.0.0/0= “Windows, send only IPv4 traffic through WireGuard”AllowedIPs = 0.0.0.0/0, ::/0= “Windows, send ALL traffic (IPv4 AND IPv6) through WireGuard”
Without ::/0, Windows treats IPv6 traffic differently—it sends it directly through your physical network adapter, with your real public IPv6 address exposed. This is why you need to edit that one line.
The Advanced Windows Fix: Firewall Kill Switch Alternative (WireGuard IPv6 Leak)
For power users who want bulletproof protection, there’s a Windows-specific alternative: creating a firewall-based kill switch. This doesn’t just prefer the WireGuard tunnel—it blocks all non-tunnel traffic at the Windows Firewall level.
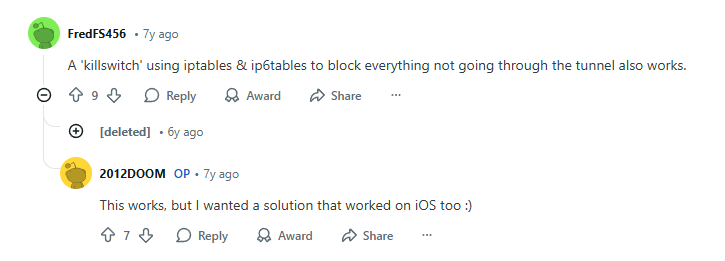
As discussed in technical forums:
“A ‘killswitch’ using iptables & ip6tables to block everything not going through the tunnel also works.”
For Windows, we use PowerShell commands instead of iptables. This method is more aggressive than the routing fix and ensures that if WireGuard disconnects, ALL internet access stops until the tunnel is restored.
Real-World Windows Troubleshooting: When the Fix Breaks Things (WireGuard IPv6 Leak)
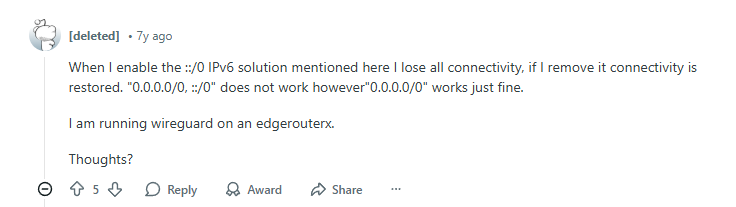
Some Windows users find that adding ::/0 suddenly breaks their internet completely. This usually points to a server-side problem, not a Windows issue. One user’s experience mirrors what many encounter:
“When I enable the
::/0IPv6 solution mentioned here I lose all connectivity, if I remove it connectivity is restored.0.0.0.0/0, ::/0does not work however0.0.0.0/0works just fine.”
Windows-Specific Diagnosis (WireGuard IPv6 Leak):
This typically means your WireGuard server doesn’t support IPv6. When Windows tries to send IPv6 packets through the tunnel, they reach the server but get dropped because the server has no IPv6 connectivity.
Windows Solutions (WireGuard IPv6 Leak):
- Contact your server provider/host and enable IPv6
- Temporarily disable IPv6 on Windows (not recommended long-term)
- Use a different WireGuard server that supports IPv6
The Windows Debugging Experience: “It Just Started Working” (WireGuard IPv6 Leak)
VPN configuration on Windows can feel unpredictable. Services, network stacks, and routing tables interact in complex ways. One user’s journey reflects a common Windows experience:
“the problem just went away. I kept adding, testing, removing, testing, and finally it just started working. I didn’t change anything and the configuration looks exactly the same as it always has.”

On Windows, this often happens because:
- Windows networking services needed a restart
- DNS client cache was holding old information
- WireGuard service needed a complete refresh
- Windows routing table required manual clearing
The lesson for Windows users: Be persistent with the correct configuration (0.0.0.0/0, ::/0) and restart networking components when troubleshooting.
Step-by-Step Windows Fix Guide for 2025
Step 1: Locate and Edit Your WireGuard Tunnel (WireGuard IPv6 Leak)
- Find WireGuard in your system tray (bottom-right corner, click the ^ arrow if needed)
- Right-click the WireGuard icon → Select your tunnel → Click Edit selected tunnel
- Alternatively: Open WireGuard from Start Menu → Select your tunnel → Click Edit
Step 2: Modify the AllowedIPs Line (WireGuard IPv6 Leak)
In the configuration editor, find this line under the [Peer] section:
text
AllowedIPs = 0.0.0.0/0
Change it to:
text
AllowedIPs = 0.0.0.0/0, ::/0
Step 3: Save and Activate (WireGuard IPv6 Leak)
- Click Save in the editor
- Disable the tunnel (toggle switch to OFF if active)
- Re-enable the tunnel (toggle switch to ON)
- Wait 5-10 seconds for Windows to apply new routing rules
Step 4: Test for IPv6 Leaks on Windows (WireGuard IPv6 Leak)
- Visit ipleak.net in your browser
- Look for the “IPv6 address” section
- Success: It should show your WireGuard server’s location or “Not detected”
- Failure: It shows your real IPv6 address (starts with 2001:, 2a00:, 2600:, etc.)
Step 5: Windows Firewall Kill Switch (Advanced) – (WireGuard IPv6 Leak)
For maximum protection, create a PowerShell script that blocks non-WireGuard traffic:
powershell
# Run as Administrator in PowerShell
$wgInterface = "YourWireGuardInterfaceName"  # Find this with: Get-NetAdapter | Where {$_.InterfaceDescription -like "*WireGuard*"}

# Block all traffic not going through WireGuard
New-NetFirewallRule -DisplayName "WireGuard Kill Switch" -Direction Outbound -InterfaceType NotEqual -InterfaceAlias $wgInterface -Action Block
The Easy Windows Alternative: VPNs with Proper WireGuard Support
If editing config files and running PowerShell scripts isn’t your style, use a Windows VPN app that handles WireGuard correctly out of the box. These apps automatically prevent IPv6 leaks without any manual configuration.
1. NordVPN: Best WireGuard Implementation for Windows (WireGuard IPv6 Leak)
- Why Windows users love it: NordVPN’s NordLynx protocol (built on WireGuard) offers one-click protection. The Windows app automatically blocks IPv6 leaks, includes a reliable kill switch, and maintains incredible speeds perfect for Windows gaming and streaming.
- Windows-specific features: Auto-connect on unsafe WiFi, split tunneling for apps, and Meshnet for secure Windows-to-Windows connections.
- Click Here
*Get Now.*
2. Surfshark: Best for Multiple Windows Devices (WireGuard IPv6 Leak)
- Why it’s great for Windows households: Surfshark’s clean Windows app uses WireGuard by default with automatic IPv6 protection. Unlimited simultaneous connections mean you can protect every Windows PC in your home with one subscription.
- Windows-specific features: CleanWeb ad-blocking, Whitelister (split tunneling), and NoBorders mode for restricted networks.
- Click Here
*Get Now.*
3. Proton VPN: Best for Privacy-Focused Windows Users (WireGuard IPv6 Leak)
- Why tech-savvy Windows users choose it: Proton VPN’s Windows app is open-source and transparent. Its WireGuard implementation includes perfect forward secrecy and automatic IPv6 leak protection. The kill switch is particularly robust on Windows.
- Windows-specific features: Secure Core servers, Tor over VPN, and port forwarding support.
- Click Here
*Get Now.*
Windows-Specific Troubleshooting Checklist (WireGuard IPv6 Leak)
✅ If ::/0 breaks your internet on Windows:
- Open Command Prompt as Administrator and run:
netsh interface ipv6 reset - Restart your Windows PC
- Check if your WireGuard server supports IPv6 (ask your provider)
- Try a different DNS server in your WireGuard config:
DNS = 1.1.1.1, 2606:4700:4700::1111
✅ If IPv6 still leaks after adding ::/0:
- Run in Command Prompt (Admin):
route print -6and verify your default IPv6 route points to WireGuard - Disable other VPNs/network adapters that might be interfering
- Update WireGuard for Windows to the latest version
- Check for IPv6 tunnel brokers or teredo tunnels:
netsh interface teredo show state
✅ For complete Windows WireGuard security:
- Use
::/0in your config AND enable WireGuard’s built-in kill switch - Test on multiple sites: ipleak.net, test-ipv6.com
- Consider disabling IPv6 on Windows temporarily (Settings → Network → Adapter options → Properties → uncheck “Internet Protocol Version 6”)
Windows FAQ: WireGuard & IPv6 Leaks (WireGuard IPv6 Leak)
Q: How do I know if my Windows PC is using IPv6?
A: Open Command Prompt and type: ipconfig /all. Look for “IPv6 Address” entries. If you see one (not starting with fe80:), you’re using IPv6 and need the fix.
Q: Can Windows Firewall block IPv6 leaks instead?
A: Yes, but it’s complex. You’d need advanced firewall rules that block IPv6 traffic when WireGuard is disconnected. The ::/0 method is simpler and built into WireGuard itself.
Q: I use Windows for gaming. Will this affect ping or latency?
A: WireGuard typically improves or maintains gaming performance. The IPv6 fix adds no extra latency—it just ensures your IPv6 traffic takes the same optimized route as your IPv4 traffic.
Leave a Reply